How to create personalized newsletter images with PRESENTA
Posted on November 14, 2021 in
2 min read
Personalized newsletters are a key aspect in any Marketing Automation strategy.
With PRESENTA you can generate thousands of personalized images automatically, ready to be included as newsletter header for in your campaigns.

In this walk-through we're learning how to configure a Data-Driven Template to generate thousand of personalized and unique images, one for each of your recipient.
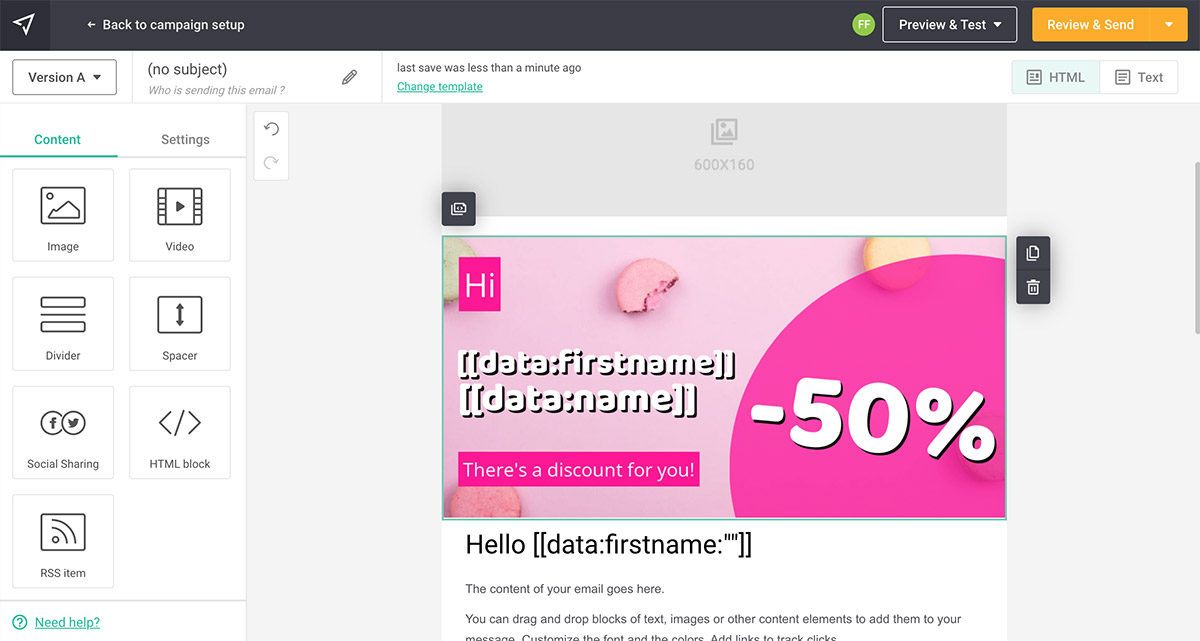
Design the template
You can choose a pre-built template and customize it further or start from scratch and create your very own template with the visual editor, no code is required:
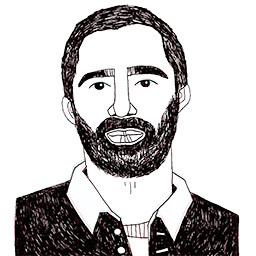
Set the dynamic properties
We need to tell the software which are the dynamic properties. Set a meaningful and unique name to each object we want to be dynamic. It can be text content, image url, shape color or even a QRCode url as well:

Publish the template
Publish the template and grab the URL to test it with its default parameters:
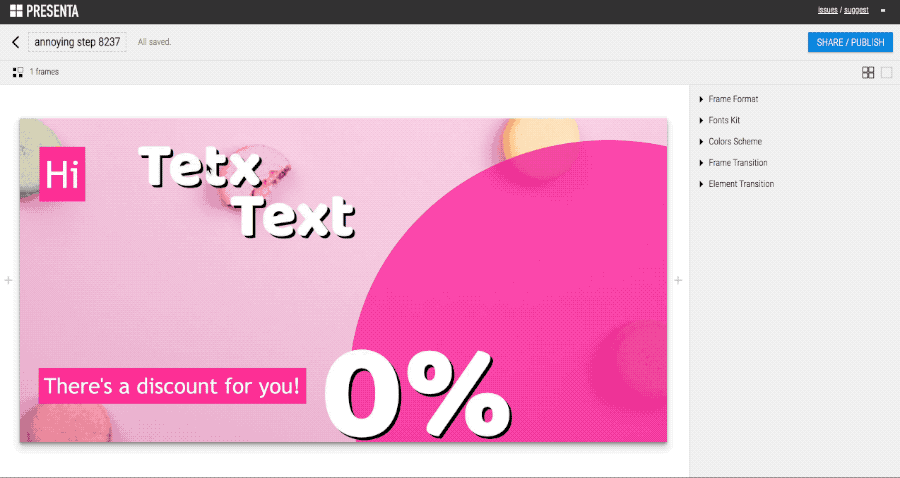
Test the parameters
Now it's time to test the parameters to see how it looks with different content:
You can test right in your browser using this URL:
https://app.presenta.cc/f/render/zGywhb2oJn:3hIW3WhkK
and adding this portion at the end of it (you can change the SomeName value):
?name=Some Name
and also this one too:
&surname=Some Surname
Integrate in your Newsletter software
Every Newsletter software allows to add little snippets of HTML code. Usually adding the following HTML code is enough to include the dynamic image:
<img src="<THE-PRESENTA-TEMPLATE-URL-WITH-PARAMS" />
MailChimp integration

Here the HTML snippet that include the image with the merged tags of MailChimp (dimensions may change depending of the template):
<div class="mcnTextContent">
  <img class="mcnImage" style="width:100%"
  src="https://app.presenta.cc/f/render/zGywhb2oJn:3hIW3WhkK
  ?name=*|FNAME|*&surname=*|LNAME|*" />
</div>
MailJet integration
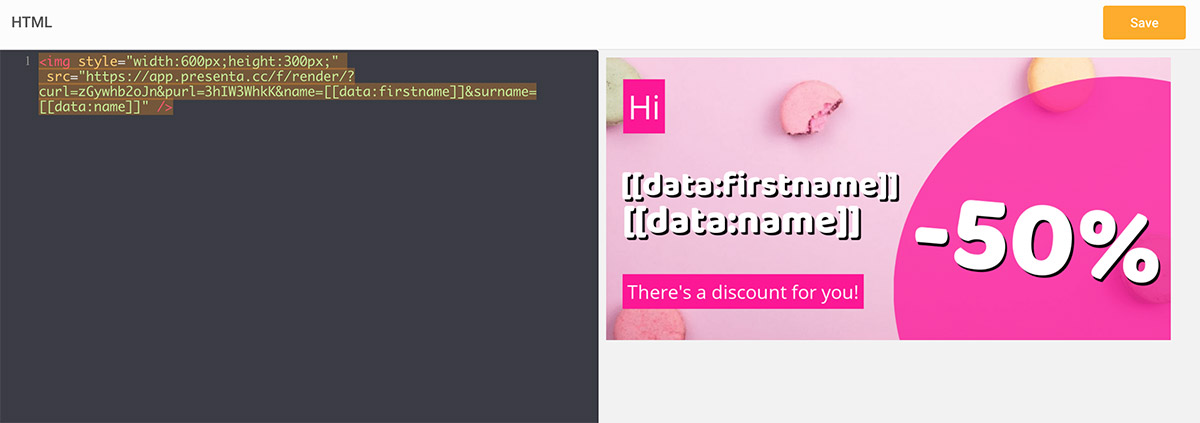
Here the HTML snippet that include the image with the merged tags of MailJet (dimensions may change depending of the template):
<img style="width:600px;height:300px;"
src="https://app.presenta.cc/f/render/zGywhb2oJn:3hIW3WhkK?name=
[[data:firstname]]&surname=[[data:name]]" />
Conclusion
That's all folks! Hope this little walk-through has been useful for your next Marketing Automation Campaign with Data-Driven images.
Learn more on PRESENTA Platform!
The automation platform for data-driven presentational documents.