Implement the background subtraction technique with Canvas and JS
Posted on January 19, 2020 in
4 min read
I'm working on a project that requires some image manipulations on the fly. This is a perfect opportunity to refresh my knowledge on javascript API of the canvas element and, possibly, to learn something new.
In this quick tutorial, I'm going to show how to make the classic "background subtraction" technique that is useful in many situations where there's a need to compare two different frames coming from the same source.
The technique is widely used in object and motion-detection software where the comparison is meant to identify the image part that changed for some reason.
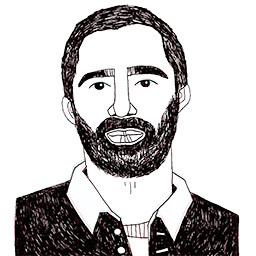
Suppose to have this frame:

and then this one:

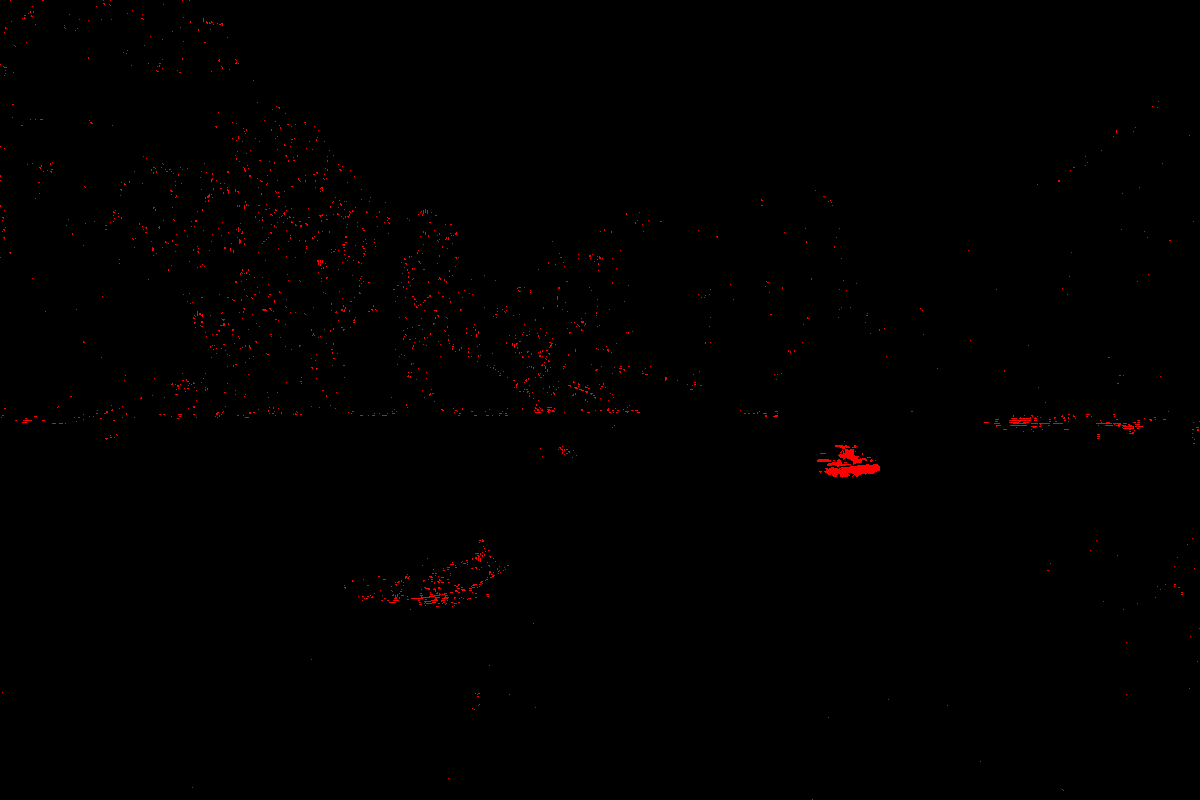
and want to compare them in order to spot some differences, such as:

Getting the data from an image
Comparing two images means we need to compare two arrays of pixel representing the mentioned pictures. The canvas API allows that with the getImageData method, therefore, the process is something like:
- load the images
- draw each onto a canvas element
- grab the pixel array
- do the pixel operations
- push back the manipulated pixel into the canvas
Load the images and get the pixels
Let's make ES6 friendly the common image loading snippet:
const load = path => {
  return new Promise((resolve, reject) => {
    const img = new Image()
    img.src = path
    img.onload = () => {
      resolve(img)
    }
  })
}
This way we can write something like:
;(async () => {
  const img1 = await load('/assets/1.jpg')
})
Then, create a helper function to get the pixel array from a given image (assuming there're already defined two constants for the dimension):
function draw (img) {
  const canvas = document.createElement('canvas')
  canvas.width = w
  canvas.height = h
  document.body.appendChild(canvas)

  const ctx = canvas.getContext('2d')
  // the filter feature is experimental and supported only on Chrome and Firefox
  ctx.filter = 'blur(4px)'
  ctx.drawImage(img, 0, 0, w, h)
  return ctx.getImageData(0, 0, w, h)
}
And here how to use them together with two frames:
;(async () => {
  const img1 = await load('/assets/1.jpg')
  const data1 = draw(img1)

  const img2 = await load('/assets/3.jpg')
  const data2 = draw(img2)
})
Manipulate the pixels
Now it's time to manipulate those pixels. An ImageData (the object type the getImageData actually return) which is an array of numeric values and each number represent one channel value (in RGBA space) for each pixel.
Let's create the result canvas and getting its pixels:
const canvas = document.createElement('canvas')
canvas.width = w
canvas.height = h
document.body.appendChild(canvas)
const ctx = canvas.getContext('2d')
// we need to draw something otherwise the putImageData method doesn't work properly
ctx.rect(0, 0, w, h)
ctx.fill()
const data3 = ctx.getImageData(0, 0, w, h)
And now, change the values comparing the two frames previously loaded. A little recap here:
data1is the first frame pixel arraydata2is the second frame pixel array- for each channel of each pixel we check if the value is the same or not
- if the pixel is changed, we assign a red color in the result canvas
- after the manipulation we set the last canvas with the updated pixel array using the
putImageDatamethod:
for (var i = 0; i < data1.data.length; i += 4) {
  var ir = data1.data[i]
  var ig = data1.data[i + 1]
  var ib = data1.data[i + 2]

  var fr = data2.data[i]
  var fg = data2.data[i + 1]
  var fb = data2.data[i + 2]

  const dr = Math.abs(ir - fr) > 10 ? fr : 0
  const dg = Math.abs(ig - fg) > 10 ? fg : 0
  const db = Math.abs(ib - fb) > 10 ? fb : 0

  const pxchanged = (dr > 0 && dg > 0 && db > 0)
  data3.data[i] = pxchanged ? 255 : 0
  data3.data[i + 1] = pxchanged ? 0 : 0
  data3.data[i + 2] = pxchanged ? 0 : 0

  ctx.putImageData(data3, 0, 0)
}
Quirks I've learned
Comparing two nearly identical images might be not straightforward as you might be expected because pixels get manipulated also by lossless file format algorithms, such as JPG. A little blur filter might come in handy and the canvas element has an experimental filter property that does the job very well. You can see here a version without the blur effect:
For some reason the context of a canvas that has not already been painted, doesn't work properly, for example, the putImageData doesn't work at all. A quick solution has been to draw a black rect before start using its context.
You can check the full source code as usual from its own repository.
Happy manipulation!